.
So, I got right down for it and made a post-it board for notes and pictures, with fabric and elastic and everything... I'm quite interested in seeing how the intended recipient takes it. Her birthday was a few months ago (like, March), and I've been meaning to get around to finishing my little gift, but I finally sucked it up and did it. Surprisingly, the bf was very helpful in this endeavor, finding the awesome-est fabric ever.
It wasn't as cheap as I'd have liked it to be as I'm... cheap. And broke. And a student.
But it was cute, so I did it anyway.
Then I realized just how much "two metres" actually is.
For someone who lived in Canada their entire life, you'd think I'd have a better estimation of a metre. NOOOOOOooooooo, I think in different terms when it comes to measurements. I know a centimetre. I know an inch. One inch is more or less 2.5 cm. But two metres... is a lot of fabric.

I also have to admit that yes, I cheated. I cheated big time. I think. Or maybe I just endeavored to make it a little easier than it would have been with staples. And after my stint as a framer of artwork, I just don't fancy desk staples an impressive finishing substance any longer.
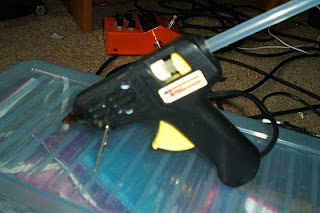
But I could get away with a hot glue gun.
It made a few things look messy, so much so that I would advise doing the elastics at the same time as the ribbon on the outside so as not to get the little bumps at the midpoints of the ribbon, or I don't know, come up with something else.

So, I started by making lines of hot glue inward toward the board's frame. Then I stuck the fabric down. I started at the bottom and worked my way up evenly on both sides of the frame, in sections.
It was quite easy, just make sure that the fabric is flat or you'll have to pull it up.
Then I folded the corners at the back first with a fabric corner pulled in to the board,

then the two flappies on either side of it being pulled in towards and gluing each down in order.


Then came the elastic. I glued the elastic down first, then added the ribbon to hide the bumpy globules of hot glue. Again, you might want to have pinned down the elastic in advance to this, leaving the edges of the elastic slack so that when you glue the ribbon down around the edges, because as I said, it does look sort of messy around the edges where there are TWO globs of glue-one for the elastic and one for the ribbon.
Then I pinned clear pins over the criscrosses because the elastic sort of pops up and pictures don't fit as well under when they aren't pinned at the cross points.
And then voila!

So, hopefully she'll like it, and then I photoshopped some interesting "vacations" that we took "together". :P
Oh, also, did I mention that I foolishly made a bonnet? Hahahaha, baaaaaad mistake. I thought it might turn out. I must have misread or mis interpreted a few things wrong (and I substituted a piece of cotton fabric folded double and cut because I didn't have interfacing as a noob and it was very, very late and I'd wasted so much time that I was going to finish...), and so now I have massive ties and it kind of looks wrong at the top. Also my sizing was probably three inches off, but I was guessing big time because the recipe from the buns and baskets blog was assuming adult sizes and I picked the absolute biggest ( I have a big head I guess?) (and I'm not blaming the recipe, by the way, so try it for yourself. I just can't sew)!


Maybe I'll try it again, now that it's been updated to a real picture and not just hand drawings, so I can be led by hand slowly and gently and easily like a picture book to a new reader. And if it turns out, this bonnet's going to my cousin. If not I'll start doing something else that I haven't figured yet. But I do work at a donation-taking thrift store...
No comments:
Post a Comment